Step-by-Step Guide on How to Grow Microgreens at Home
Learn how to grow microgreens at home is a rewarding and simple way to add fresh flavors and nutrients to your meals. These tiny but mighty plants are packed with vitamins and minerals, making them a popular choice for health-conscious eaters. Follow these easy steps to start your microgreens journey!
Choose Your Microgreens
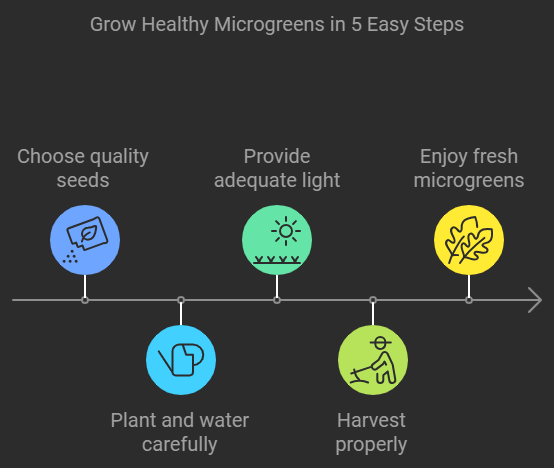
The first step to growing microgreens is to decide which variety you want to grow. Some popular choices include:
- Basil: Perfect for adding to pasta and salads.
- Radish: Adds a spicy kick to dishes.
- Peas: Sweet and crunchy, excellent in sandwiches.
- Sunflower: Nutty flavor, great for snacking.
- Broccoli: Mild flavor and packed with nutrients.
These all grow quickly and are easy to care for, making them ideal for beginners.
Gather Your Supplies
Here’s what you’ll need to get started:
- Seeds: Purchase high-quality microgreen seeds from a garden center or online store.
- Growing trays: Shallow trays are best for microgreens; you can use seed trays or any shallow container.
- Soil: Look for a high-quality potting mix without fertilizer or chemicals.
- Water: A spray bottle will help keep the moisture manageable.
- Light source: Place your trays in a sunny window or use grow lights for best results.

Prepare Your Growing Trays
To set up your growing trays, follow these steps:
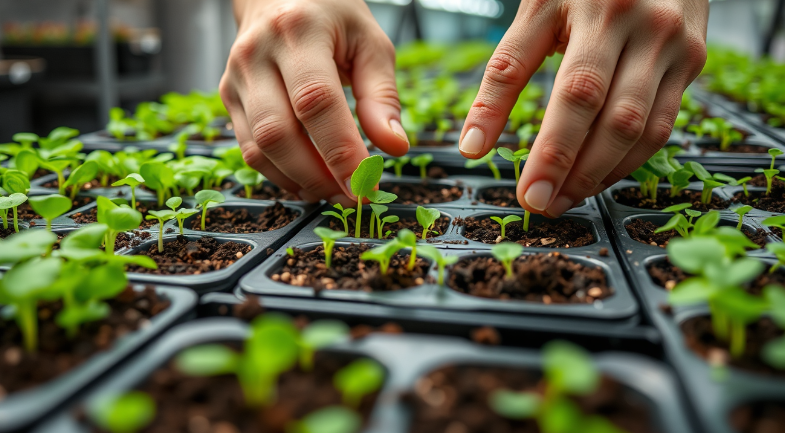
- Start by filling your trays with about 1-2 inches of potting soil, making sure it is evenly spread.
- Lightly tamp down the soil to remove air pockets, but avoid compacting it too much.
- Moisten the soil with a spray bottle, ensuring it is damp but not soggy.
Sow the Seeds
Sowing your microgreen seeds is simple:
- Sprinkle seeds evenly across the soil surface. Aim for a dense coverage, as they will grow close together.
- Gently press the seeds into the soil using a flat board or your hand for good seed-to-soil contact.
- Cover the seeds with a light dusting of soil to protect them.
Water and Cover
After sowing, it’s time to water:
- Lightly mist the seeds to keep them moist.
- Cover the trays with a lid or a damp paper towel to keep humidity high until the seeds germinate.
Keep an eye on moisture levels, ensuring the soil doesn’t dry out completely.
Provide Light
Once your seeds have sprouted (usually in 3-7 days), remove the cover to let light in:
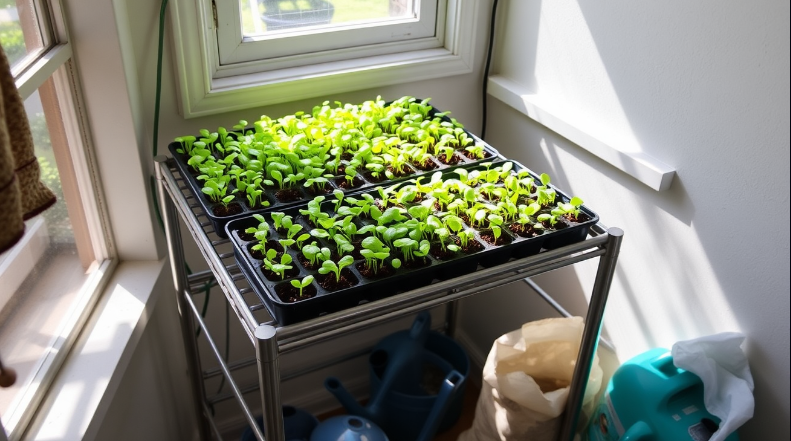
- If using natural sunlight, place your trays in a sunny location.
- If using artificial lights, set them about 2-6 inches above the plants and keep the lights on for 12-16 hours daily.
Watering and Maintenance
As your microgreens grow, proper care is essential:
- Keep the soil consistently moist but not waterlogged.
- Rotate trays if they are not getting even light exposure.
Microgreens typically take around 2-3 weeks to grow to a harvestable size.
Harvest Time
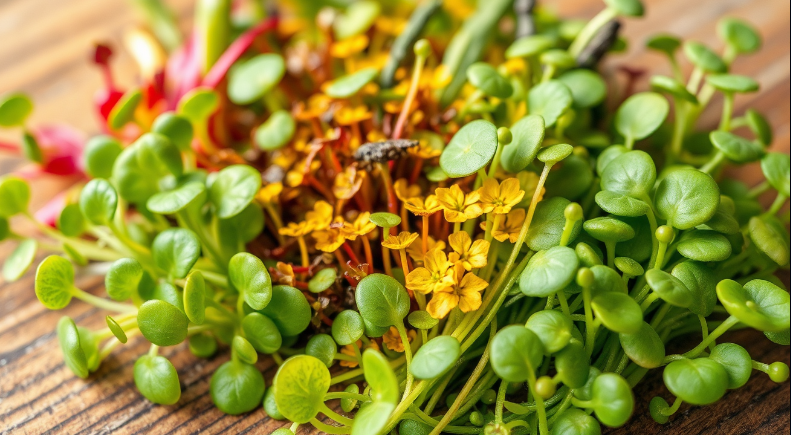
Your microgreens are ready for harvesting when they are about 1-3 inches tall and have developed their first true leaves. To harvest:
- Use scissors to cut the greens just above the soil line.
- Rinse them gently in cool water to remove any soil.
- Store in the refrigerator for up to a week, but they’re best enjoyed fresh!
Growing microgreens at home is not just easy but also incredibly satisfying. With just a few simple supplies and a little bit of care, you’ll be able to enjoy fresh, homegrown microgreens in no time. Whether you sprinkle them on salads, sandwiches, or soups, they will elevate your meals with incredible flavor and nutrition. So gather your supplies and start your microgreens garden today!
Essential Tools and Supplies for Growing Microgreens Successfully
Growing microgreens at home is a rewarding and straightforward process, but having the right tools and supplies is essential to achieve the best results. If you’re starting your microgreen journey, consider investing in a few key items. Below are some of the essential tools and supplies you’ll need.
Seeds
The foundation of your microgreens garden starts with quality seeds. Look for seeds specifically labeled for microgreens to ensure they produce the best flavors and nutrients. Here are some popular options:
- Basil: Known for its aromatic flavor.
- Radish: Offers a spicy kick.
- Sunflower: Provides a nutty taste and crunchy texture.
- Pea shoots: Sweet and tender, good for salads.
- Broccoli: High in nutrients with a mild flavor.
Growing Trays
Having the right trays is crucial for cultivating your microgreens. Look for shallow trays that allow for proper drainage. Here are some types to consider:
- Seedling Trays: These are often used for starting plants and work well for microgreens too.
- Customizable Trays: Adjustable trays let you create different zones for various seeds.
Growing Medium
A suitable growing medium helps seeds germinate and grow healthy microgreens. Avoid regular potting soil as it can be too dense. Instead, consider one of the following options:
- Coconut Coir: Lightweight and retains moisture well.
- Soilless Mix: A mixture specifically formulated for starting seeds.
- Papers or Mats: Biodegradable and great for easy extraction.
Watering Tools
Keeping your microgreens moist is vital for their growth. Use one of these tools to water your trays effectively:
- Spray Bottle: Gently mist your seeds to avoid washing them away.
- Watering Can: Opt for one with a fine spout to control the flow of water.
- Bottom Watering Method: Place trays in shallow water to absorb moisture from below.
Lighting
Microgreens need adequate light to thrive. Here’s how you can provide the right lighting:
- Natural Light: A south-facing window can work, but ensure they get 12-16 hours per day.
- Grow Lights: LED or fluorescent lights can be used if natural sunlight is insufficient. Select lights that are about 2-4 inches above the plants.
Temperature and Humidity Controls
Microgreens prefer a temperature range of 60-70°F (15-21°C). Maintaining the right humidity is also important. To achieve this, consider these helpful tools:
- Thermometer: Keep an eye on temperature for best results.
- Humidity Dome: This helps maintain moisture around the seeds during germination.
Harvesting Tools
Once your microgreens are ready to harvest, having the right tools makes the process smoother:
- Scissors or Shears: A clean pair ensures a quick cut, helping to maintain freshness.
- Containers: Prepare small containers or bags to store your freshly harvested microgreens.
Investing in these essential tools and supplies can significantly enhance your microgreens growing experience. Remember, successful microgreen cultivation requires patience, observation, and a bit of practice. Start with a small batch, experiment with different seeds, and enjoy the process of watching your greens flourish!
Nutritional Benefits of Incorporating Microgreens into Your Diet

Microgreens are small but mighty. These tiny greens pack a punch in terms of flavor and nutrition, making them an excellent choice for anyone looking to enhance their diet. Not only do they add a pop of color and taste to meals, but they also offer numerous health benefits that can improve your well-being.
One of the most impressive aspects of microgreens is their nutrient density. In fact, many varieties of microgreens are rich in vitamins and minerals, even more so than their mature counterparts. For example, radish microgreens are loaded with vitamins A, C, and E, while broccoli microgreens contain high amounts of sulforaphane. This compound is known for its cancer-fighting properties. By including these tiny powerhouses in your meals, you can increase your intake of essential nutrients with minimal calories.
Here are some key nutritional benefits of incorporating microgreens into your diet:
- Rich in Antioxidants: Microgreens contain high levels of antioxidants that can help combat oxidative stress in the body. Antioxidants neutralize harmful free radicals, which can contribute to chronic diseases. For example, amaranth greens are known for their significant antioxidant properties.
- Boost in Dietary Fiber: Many varieties of microgreens can add a healthy dose of fiber to your diet. This is essential for maintaining a healthy digestive system and can help with weight management. Pea shoots are especially high in fiber, making them a great addition to salads.
- Enhanced Flavor Profiles: Microgreens come in a variety of flavors, ranging from peppery to sweet. This diversity allows you to experiment with different tastes and make your meals more exciting. For instance, basil microgreens add a fresh, aromatic sweetness to dishes, enhancing the overall culinary experience.
- Support for Heart Health: Certain microgreens, like sunflower and beet greens, can be beneficial for heart health. They contain nutrients, such as potassium and magnesium, which can help regulate blood pressure and support overall cardiovascular health.
- Improved Immune Function: Many microgreens are rich in vitamin C, known for its role in boosting the immune system. Varieties such as cilantro and mustard greens contain abundant levels of this vital nutrient, making them excellent choices to help keep you healthy.
Microgreens into your meals is easier than you might think. You can add them to salads, sandwiches, smoothies, and even soups. They make a delightful garnish for various dishes, adding both flavor and nutrition. For example, topping your avocado toast with a handful of radish microgreens not only looks beautiful but also enhances the dish’s nutritional profile.
For those looking to maximize the nutritional benefits of microgreens, consider growing them at home. It’s simple and a great way to ensure you have access to fresh varieties. By cultivating your own microgreens, you can enjoy them at their peak freshness, which often means better taste and nutrition. Many home gardeners love to grow varieties like arugula, beet, and cabbage microgreens, which are not only easy to grow but also incredibly nutritious.
Moreover, microgreens can help you diversify your meal plans. If you’re stuck in a culinary rut, adding a few microgreens can inspire creativity in the kitchen. They harmonize well with various cuisines, from Mediterranean to Asian, allowing you to explore new flavors and experiences. Whether you’re drizzling some lime over a dish or tossing them into a stir-fry, microgreens offer versatility that can transform your meals.
While microgreens are small, their impact on nutrition can be significant. As part of a balanced diet, they can help you meet your health goals while delighting your taste buds. With so many benefits packed into such a tiny package, there’s no excuse not to give microgreens a try!
The incorporation of microgreens into your diet not only enhances the sensory experience of your food but also provides a wide range of health benefits. From antioxidants to dietary fiber and supportive vitamins, these miniature greens deserve a spot on your plate. Embrace their unique flavors and nutritional advantages to take your meals to the next level!
Common Mistakes to Avoid When Growing Microgreens
If you’re eager to start your microgreen journey, it’s essential to know some common pitfalls to avoid. Microgreens are not only delicious, but they also pack a nutritional punch. However, many beginners make mistakes that can lead to disappointing results. Below are some crucial tips to help you grow microgreens successfully at home.
Choosing the Wrong Seeds
One of the first steps in growing microgreens is selecting the right seeds. Not all seeds are suitable for growing microgreens. You should aim for non-GMO, organic seeds that are specifically labeled for microgreen production. Check for quality and ensure they are free from pesticides. Choosing the wrong type of seeds can lead to slow growth and poor flavor.
Improper Soaking
Many microgreen seeds benefit from soaking before planting. However, too much soaking can harm them. It’s important to soak seeds according to their specific requirements. Here’s a brief guide:
- Small seeds (like arugula or basil): Soak for 2-4 hours.
- Medium seeds (such as broccoli): Soak for 6-8 hours.
- Large seeds (like sunflower or pea): Soak for 8-12 hours.
After soaking, always rinse them well to remove any residue. Skipping this step or over-soaking can lead to poor germination.
Inadequate Light
Light is critical for healthy microgreens. Many beginners underestimate how much light these little plants need. Microgreens thrive best with 12-16 hours of light each day. If you don’t have access to bright natural light, consider using grow lights. Position them close to your microgreens and keep them on for the recommended duration for optimal growth.
Overwatering
Watering is vital, but it can also lead to problems if done improperly. Many growers tend to overwater their microgreens, which can cause root rot and mold. Always check the moisture level of your growing medium before watering. A good rule of thumb is that the soil should feel moist but not soggy. Use a spray bottle or gentle watering can to avoid flooding the trays.
Neglecting Air Circulation
Good air circulation helps prevent mold and pests. If you’re growing microgreens indoors, ensure your growing area has adequate ventilation. Open a window, or use a small fan to keep the air moving around your plants. This will help strengthen the stems and promote healthy growth.
Not Harvesting at the Right Time
Timing is crucial when harvesting microgreens. Waiting too long to harvest can lead to bitter flavors and tougher textures. Most microgreens are ready to harvest between 7-21 days after germination, depending on the type. Look for vibrant color and a height of about 1-3 inches. Use scissors to snip them above the soil line for the best results.
Ignoring Cleanliness
Growing microgreens means you are producing food, so cleanliness is key. Always ensure your trays, soil, and any tools are clean and sanitized before use. This will reduce the risk of introducing harmful bacteria and pesticides into your microgreens. A clean workspace promotes a healthy growing environment.
Using Poor Quality Soil
Not all soil is created equal. For microgreens, it’s best to use a seed-raising mix that allows for drainage and aeration. Potting soil that’s too dense can suffocate seeds and cause slow growth. Avoid using garden soil as it may contain pests, diseases, or chemicals damaging to your plants.
Rushing the Process
Patience is important. If you rush through the planting and care stages, you may miss essential steps for success. Take your time to plan, sow, water, and monitor your microgreens as they grow. Each variety has its own timeline, so understanding these differences will lead to better results.
By keeping these tips in mind, you can significantly increase your chances of growing healthy and vibrant microgreens at home. Enjoy the process, and soon you’ll be harvesting your own delicious greens right from your kitchen!

Creative Ways to Use Microgreens in Your Cooking
Microgreens are tiny, nutrient-packed plants that are popular in kitchens worldwide. Not only do they add vibrant color and texture to dishes, but they also bring a burst of flavor. Here are some creative and delicious ways to incorporate microgreens into your cooking.
Garnish with Style
One of the simplest ways to use microgreens is as an eye-catching garnish. They add a pop of color and a touch of sophistication to various dishes. Here are a few ideas to get you started:
- Soups: Sprinkle a handful of micro basil or cilantro on top of creamy soups, such as tomato or butternut squash, to elevate the presentation and flavor.
- Salads: Mix different types of microgreens into your salad for an appealing look. Combine arugula, radish greens, and pea shoots for an exciting twist.
- Plated Dishes: Use microgreens to finish off plated entrees like grilled fish or roasted meats, adding freshness and depth.
Enhance Your Sandwiches and Wraps
Sandwiches and wraps can get a flavor boost with the addition of microgreens. Their tender leaves and robust taste create better texture and nutrition. Consider these combinations:
- Wraps: Spread hummus or avocado on a whole grain wrap and layer with turkey, cucumbers, and a handful of broccoli microgreens for a crunchy kick.
- Grilled Cheese: Add a layer of microgreens, such as sunflower or beet greens, to your grilled cheese for a gourmet sandwich.
- Open-Faced Sandwiches: Top whole-grain bread with cream cheese, smoked salmon, and a generous handful of dill microgreens for a delightful brunch option.
Boost Your Breakfast
Start your day right by incorporating microgreens into breakfast dishes. Not only do they add flavor, but they also offer a nutrient boost. Try these tasty ideas:
- Omelettes: Mix micro spinach or kale into your egg mixture before cooking for a colorful, nutritious breakfast.
- Avocado Toast: Top your avocado toast with a mix of micro cilantro and radish greens for a refreshing twist.
- Smoothies: Blend microgreens like pea shoots into your smoothie for added vitamins. They blend well with fruits and other greens.
Incorporate into Dressings and Dips
Microgreens can also enhance flavors in your homemade dressings and dips. Their taste can elevate traditional recipes:
- Salad Dressings: Blend microgreens like arugula with olive oil, vinegar, and your favorite spices to create a vibrant dressing.
- Guacamole: Mix finely chopped micro cilantro or jalapeño microgreens into your guacamole for an added flavor kick.
- Spinach Dip: Stir in micro basil or parsley to your spinach dip for an herbaceous touch.
Experiment in Cooking
Don’t shy away from adding microgreens to cooked dishes. They can enhance flavors while contributing to your plate’s nutrition profile:
- Stir-fries: Toss microgreens in during the last minute of cooking for added nutrients and a crunchy texture. Try using micro bok choy or mustard greens.
- Pasta Dishes: Sprinkle micro arugula on top of pasta dishes right before serving for a fresh finish.
- Pizza Topper: Add microgreens such as kale or radish on top of your pizza after baking for a fresh contrast to the warm, melted cheese.
Microgreens into your meals is not only simple but also a delightful way to enhance your dishes’ flavor, presentation, and nutritional value. By experimenting with these creative ideas, you can discover new ways to enjoy the unique tastes and textures microgreens bring to your table. So, the next time you’re in the kitchen, think of microgreens as your secret ingredient for culinary creativity!

Key Takeaway:
Growing microgreens at home can transform your culinary experiences and add a burst of nutrition to your meals. This article provides a comprehensive overview to help you get started on this rewarding journey.
Step-by-Step Guide on How to Grow Microgreens at Home: The process begins with selecting the right seeds, such as arugula, radish, or basil, which are easy to grow. Using shallow trays filled with seed starting mix, you’ll sow the seeds densely and cover them lightly with soil. Keep the trays in a warm, well-lit area and ensure they receive adequate moisture. After a week or two, you’ll witness the delightful green shoots sprouting, ready for harvest. This simplicity makes growing microgreens accessible to anyone.
Essential Tools and Supplies for Growing Microgreens Successfully: To succeed, you’ll need a few key tools. These include shallow containers, quality soil, a spray bottle for watering, and natural light or a grow light if sunlight is limited. Having these tools on hand will set the stage for healthy growth.
Nutritional Benefits of Microgreens into Your Diet: Microgreens are not just plants; they are nutritional powerhouses. They contain vitamins, minerals, and antioxidants at concentrations often higher than their mature counterparts. Adding these greens to your diet can enhance your overall health, supporting immune function and wellness.
Common Mistakes to Avoid When Growing Microgreens: It’s important to be aware of common pitfalls, such as overwatering or choosing the wrong seed types. Understanding these mistakes can help you maintain healthier plants and make your growing experience more successful.
Creative Ways to Use Microgreens in Your Cooking: microgreens can elevate your dishes. Whether used in salads, as garnishes, or blended into smoothies, they add flavor and freshness. Their unique textures and tastes can create an exciting element to any meal.
Growing microgreens at home is both easy and beneficial. By following the simple steps, utilizing the right tools, recognizing the extensive health benefits, avoiding common mistakes, and exploring innovative ways to use them, you can not only enjoy fresh greens but also enhance your culinary creativity. Embrace the joy of growing and savor the flavors and health benefits microgreens bring to your table!
Conclusion
Growing microgreens at home is a rewarding and straightforward endeavor that brings fresh flavors and essential nutrients right to your kitchen. By following the step-by-step guide outlined, you can begin your journey into microgreens gardening with confidence. Remember, having the right tools and supplies—such as quality seeds, soil, and seed trays—sets the foundation for success.
Microgreens into your diet provides numerous nutritional benefits, including higher concentrations of vitamins and minerals compared to their mature counterparts. They are a fantastic addition for those looking to boost their health while adding vibrant colors and unique flavors to meals.
Avoiding common mistakes, such as overwatering and choosing the wrong seeds, is crucial. By being mindful of these pitfalls, you’ll ensure a bountiful harvest.
Unleash your culinary creativity! Whether you sprinkle them on salads, blend them into smoothies, or use them as a garnish for your favorite dishes, microgreens can elevate any meal. With a bit of patience and care, you’ll enjoy the fruits of your labor in no time. Start growing microgreens today and discover the taste and health benefits they offer—your taste buds and body will thank you!

