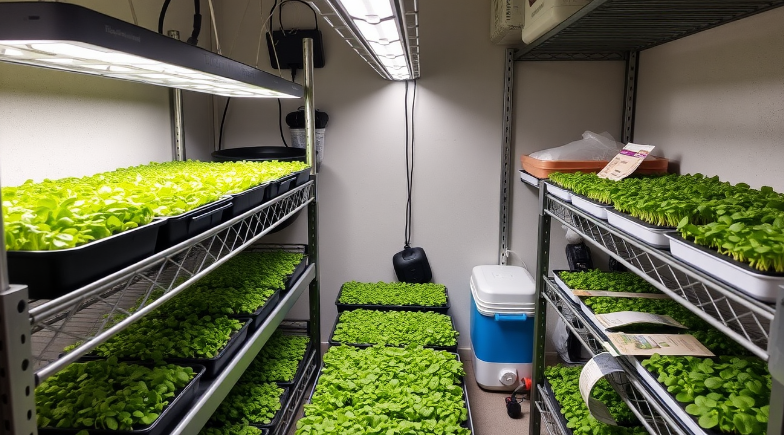
Microgreens have become a popular choice for gardeners, chefs, and health enthusiasts alike. These tiny, flavorful greens pack a nutritional punch and are easy to grow at home. But to get the most out of your microgreens, knowing when and how to harvest them is key. Proper harvesting not only enhances their taste and nutrition but also ensures they look fresh and vibrant.
In this guide, we’ll walk you through the steps to harvesting microgreens perfectly. We’ll cover the ideal timing for harvest and provide a step-by-step process so you can enjoy the best flavor and nutritional value from your greens.
Why Timing is Crucial in Harvesting Microgreens
Harvesting microgreens at the right time is essential for maximizing their flavor, texture, and nutritional value. These small greens go through different growth stages, and understanding when they are at their peak is the key to a successful harvest.
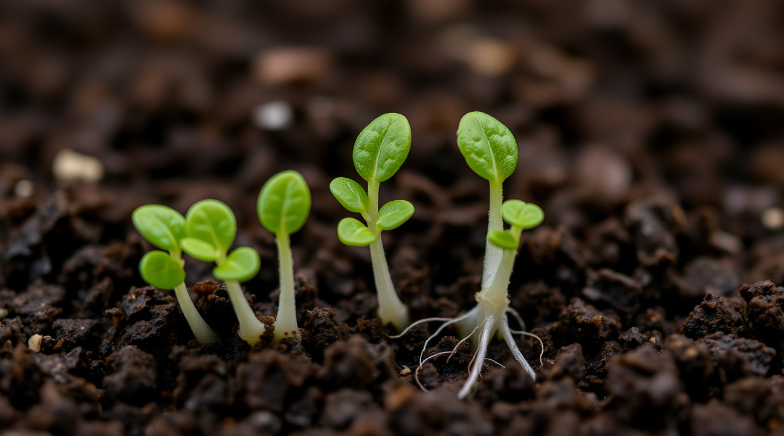
Microgreens are typically harvested when they are in the cotyledon stage, which is when the first leaves, called cotyledons, emerge after germination. At this point, the microgreens have the best flavor and are rich in nutrients. If you wait too long, and true leaves start to form, the flavor can become bitter, and the texture tougher.
Timing your harvest properly allows you to avoid common mistakes like harvesting too early (leading to underdeveloped flavor) or too late (which can lead to overgrown, woody stems).
By harvesting at the right moment, you’ll enjoy microgreens that are tender, vibrant, and packed with nutrients.
When to Harvest Microgreens: Key Indicators
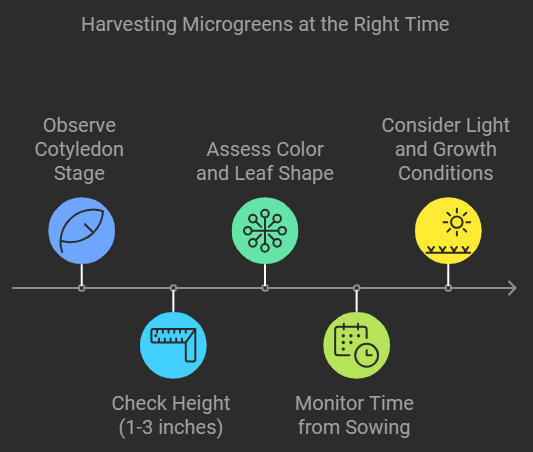
Knowing when to harvest your microgreens involves observing several key indicators. Timing is crucial because harvesting at the right moment ensures you get the best taste, texture, and nutritional value. Here are the main factors to look for:
1. Cotyledon Stage
The cotyledon stage is the perfect time to harvest most microgreens. Cotyledons are the first set of leaves that appear after germination. These leaves look different from the true leaves that eventually grow, and they carry the most concentrated flavors and nutrients. At this stage, the microgreens are young, tender, and at their nutritional peak.
- Why the Cotyledon Stage? Microgreens harvested at this stage are softer and more palatable, with a mild flavor that enhances dishes without overpowering them. Nutritionally, they contain concentrated levels of vitamins and antioxidants that make them a powerful health food.
2. Height of the Microgreens
Generally, microgreens are ready to be harvested when they reach a height of 1 to 3 inches. However, this can vary slightly depending on the variety. For example:
- Radish microgreens tend to be harvested closer to 1 inch.
- Sunflower microgreens can grow up to 3 inches before harvest.
Always refer to the specific variety you’re growing, but as a rule of thumb, 1-3 inches in height is ideal for most microgreens.
3. Color and Leaf Shape
Healthy microgreens should have vibrant colors and well-formed leaves. Look for:
- Bright green leaves with no yellowing or wilting.
- Properly shaped cotyledons, which should appear symmetrical and smooth.
If the leaves start turning a dull color or the stems become leggy, this could be a sign that you’ve waited too long.
4. Time from Sowing
Different types of microgreens have varying growth rates, so it’s important to pay attention to the typical time frame for each type. Below is a general guide:
- Radish microgreens: Ready in 7-10 days.
- Sunflower microgreens: Ready in 10-12 days.
- Pea shoots: Ready in 12-14 days.
- Broccoli microgreens: Ready in 10-15 days.
Create a chart or timeline for your different varieties to ensure you harvest at the right time.
5. Light and Growth Conditions
Light exposure and temperature play a significant role in how quickly microgreens grow. For instance:
- Bright, indirect sunlight encourages strong, vibrant growth.
- If microgreens are exposed to too little light, they may become leggy and weak, which can delay the ideal harvest time.
Keeping track of these factors will help you better predict when your microgreens are ready for harvest.
How to Harvest Microgreens: Step-by-Step Process
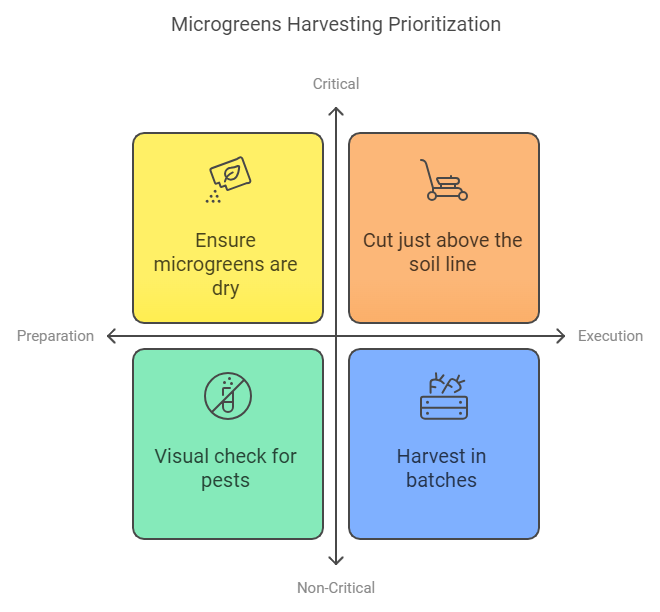
Once you’ve identified that your microgreens are ready for harvest, following the right process ensures you maintain their freshness, taste, and cleanliness. Below is a detailed step-by-step guide on how to harvest your microgreens properly.
1. Tools You’ll Need
Before you start, gather the necessary tools to make the harvesting process easy and efficient:
- Sharp scissors or a knife: A sharp tool is essential to make clean cuts, which helps avoid damaging the delicate microgreens. Scissors are often preferred for their precision, but a small, sharp knife also works well.
- Clean harvesting trays or containers: Having a clean container to collect your microgreens will help preserve their quality and keep them from being contaminated by dirt or bacteria.
Pro Tip: Keep your tools sanitized to prevent any contamination of your greens. Dull or dirty tools can introduce bacteria or cause ragged cuts that damage the greens.
2. Preparing for Harvest
To ensure your microgreens are clean and easy to cut, there are a few steps to prepare them for harvest:
- Ensure microgreens are dry: Wet microgreens can be harder to cut and store. If your microgreens are damp from watering, let them dry before harvesting. A day without watering before harvest can help them stay fresh longer.
- Do a quick visual check: Make sure there are no signs of disease, pests, or wilting before harvesting.
3. Cutting the Microgreens
The technique you use to cut the microgreens is essential for a clean harvest:
- Cut just above the soil line: Hold the microgreens gently, and cut right above the soil. Cutting too close to the soil risks contaminating the greens with dirt or grit.
- Angle your cut: Cutting at a slight angle ensures a cleaner cut and reduces the risk of pulling up roots or contaminating the microgreens.
Pro Tip: Use the “snip and lift” method, where you snip the greens with one hand and gently lift them away from the soil with the other to avoid contamination.
4. Harvesting in Batches
For those growing microgreens at home, it’s a good idea to harvest in batches:
- Harvest a portion daily or every few days: This method ensures continuous freshness if you’re growing microgreens for personal use. Harvesting a small amount each day also helps reduce waste and keeps your supply consistent.
- Avoid harvesting all at once: Unless you’re selling or using all the microgreens immediately, it’s better to avoid cutting the entire crop at once. This will keep them fresher for longer.
By following this method, you can maximize the freshness and flavor of your microgreens while avoiding common mistakes like soil contamination or rough cuts.
Post-Harvest Handling: Maximizing Freshness
Once you’ve harvested your microgreens, how you handle them post-harvest is crucial for preserving their freshness, nutritional value, and taste. Microgreens are delicate, so proper cleaning and storage are key to keeping them fresh for as long as possible.
1. Cleaning the Microgreens
While microgreens are usually grown in clean, controlled environments, you may still want to give them a light rinse, especially if they’ve been grown outdoors or if some soil has been disturbed during harvest.
- Gentle rinsing: Place the microgreens in a bowl of cold water and swirl them gently to remove any dirt or debris. Avoid using forceful water streams, as the delicate leaves can bruise easily.
- Drying them properly: After rinsing, place the microgreens on a clean kitchen towel or use a salad spinner on the lowest setting to dry them without damaging the leaves. Ensuring they are dry before storing will help prevent mold growth.
Pro Tip: If your microgreens are clean straight from the harvest, it’s often best to avoid rinsing them until you’re ready to use them, as moisture can reduce their storage life.
2. Storing Microgreens
Proper storage is essential for maintaining the quality of your microgreens. Because they are so delicate, they can wilt or spoil quickly if not stored properly. Here are the best practices:
- Use breathable containers: Store your microgreens in a container that allows air circulation, like a vented plastic container or a container lined with a paper towel. The paper towel will absorb excess moisture, keeping the microgreens dry.
- Damp paper towel method: Place a slightly damp paper towel on top of the microgreens inside the container. This helps maintain the right level of humidity to keep them fresh without becoming too wet.
- Temperature control: Keep your microgreens in the refrigerator, ideally at a temperature around 32–40°F. This will help extend their shelf life and preserve their crispness.
Storage timeframes for different microgreens:
- Radish microgreens: 5-7 days in the fridge.
- Sunflower microgreens: 5-7 days in the fridge.
- Pea shoots: Up to 10 days in the fridge.
By following these steps, your microgreens should stay fresh for up to a week, depending on the variety.
3. Avoiding Common Storage Mistakes
Even when stored in the fridge, certain factors can cause your microgreens to spoil faster. Here are some common mistakes to avoid:
- Too much moisture: Overly wet microgreens are prone to mold and decay. Always make sure they are dry before storing.
- Exposure to light: Store your microgreens in a dark area of the fridge. Exposure to light can cause them to yellow and lose nutritional value.
- Improper sealing: Microgreens need air circulation, so avoid sealing them in airtight containers for long periods, which can trap moisture and promote spoilage.
By handling your microgreens carefully after harvesting, you can extend their freshness and enjoy their nutritional benefits for longer.
Tips and Tricks for Better Harvesting
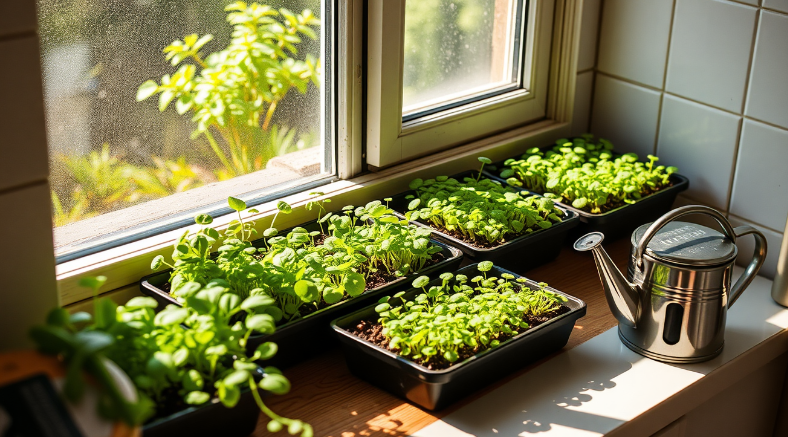
To truly master the art of harvesting microgreens, there are some additional tips and techniques that can elevate the quality and yield of your harvest. These tricks will help you get the most out of your microgreens, ensuring better flavor, longer shelf life, and more efficient growing cycles.
1. Harvest in the Morning
The time of day you choose to harvest your microgreens can significantly impact their freshness and flavor.
- Why the morning is ideal: In the early morning, microgreens are at their freshest. The cool, crisp air helps preserve the flavor and texture of the greens. By late afternoon, plants can become dehydrated or lose some of their vibrant flavors due to heat.
- Best time to cut: Aim to harvest your microgreens as soon as the morning dew has evaporated but before the heat of the day sets in.
2. Rotate Crops for a Continuous Supply
If you’re growing microgreens regularly, crop rotation can help ensure a consistent supply without long breaks between harvests.
- How to stagger plantings: Plant a new batch of microgreens every few days to a week, depending on the type. This way, you’ll have a continuous harvest cycle, allowing you to always have fresh greens.
- Plan your harvest times: By keeping track of when you plant and harvest different microgreen varieties, you can plan a steady supply to avoid running out or over-harvesting all at once.
3. Use the “Snip and Lift” Technique
This technique ensures that you avoid soil contamination and keep your microgreens clean during the cutting process.
- How to perform it: While cutting the microgreens with scissors, use your other hand to gently lift the microgreens away from the soil. This ensures you’re only cutting the tops and not accidentally pulling up roots or introducing soil into your harvest.
- Why it works: The “snip and lift” method helps avoid soil contamination, keeping your microgreens as clean as possible from the start.
4. Keep Your Tools Sharp
Sharp tools aren’t just for efficiency—they’re critical for maintaining the quality of your harvest.
- Why sharpness matters: A dull tool can tear or bruise the microgreens, making them more prone to wilting or decay. Clean cuts are essential for maintaining the integrity of the greens.
- How to keep your tools sharp: Regularly sharpen your scissors or knife. You can use a sharpening stone or send them to a professional sharpener to keep them in top condition.
5. Experiment with Different Varieties
There are countless varieties of microgreens, each with its own flavor profile, texture, and nutritional benefits. Experimenting with different types can help you find new favorites.
- Popular microgreens to try: Some common varieties include sunflower, radish, pea shoots, and arugula. Each of these has a distinct flavor and growth pattern.
- Growing tips for different varieties: Some varieties, like sunflower and pea shoots, are more robust and can handle a bit more moisture, while others, like radish microgreens, are more delicate and need a bit more attention during the harvesting process.
By incorporating these tips and tricks into your harvesting routine, you can maximize the quality and yield of your microgreens while ensuring consistent freshness and flavor.
Frequently Asked Questions (FAQs)
In this section, we’ll cover some of the most common questions people have about harvesting microgreens. These answers will help you troubleshoot any issues you may encounter and give you a better understanding of how to achieve the best results.
Q: Can I regrow microgreens after cutting them?
- Answer: Most microgreens are one-cut crops, meaning they won’t regrow after being harvested. Once you cut them, the plants won’t regenerate in the same way that larger plants might. However, there are a few exceptions, such as pea shoots, which can regrow if cut above the first node. But in general, it’s best to plant new seeds for a continuous harvest.
Q: How do I know if I’ve waited too long to harvest?
- Answer: Overgrown microgreens can have tough, woody stems and a bitter taste. Signs that you’ve waited too long to harvest include:
- The presence of true leaves (beyond the cotyledon stage).
- Yellowing leaves, which can indicate a lack of light or overgrowth.
- A change in flavor, as older microgreens tend to lose their sweetness and develop a stronger, sometimes bitter taste. It’s best to harvest when the microgreens are at their peak—just before or after the cotyledon stage for most varieties.
Q: What should I do if my microgreens don’t look ready after the suggested harvest time?
- Answer: The growth rate of microgreens can vary based on environmental factors like light, temperature, and humidity. If your microgreens don’t seem ready by the typical 7–21 day window:
- Check the environment: Ensure they are receiving enough light (either natural or artificial) and that the temperature is appropriate (most microgreens prefer 60–70°F).
- Be patient: Some varieties, like cilantro, take longer to mature than others, so don’t rush the process.
- Adjust water levels: Ensure the microgreens are receiving the right amount of moisture. Too much or too little water can slow down their growth.
Q: Should I harvest all my microgreens at once?
- Answer: It depends on how you plan to use them. If you’re growing microgreens for personal use, it’s best to harvest them in batches. This way, you’ll always have fresh microgreens on hand. However, if you’re growing them for a market or event, harvesting all at once may be necessary. Always store the harvested microgreens properly to retain freshness if you need to cut them all at once.
Q: Can I eat microgreens with true leaves?
- Answer: Yes, you can eat microgreens with true leaves, but they may taste more bitter or have a different texture than microgreens harvested at the cotyledon stage. For the best flavor and texture, it’s generally recommended to harvest them before true leaves appear, but they are still edible afterward.
By addressing these common concerns, you’ll be better prepared to deal with any challenges that may arise during the harvesting process. Remember, each variety of microgreens has its own unique needs, so always keep an eye on their growth stages to get the best harvest.
Conclusion
Harvesting microgreens is an exciting and rewarding process, but it requires careful attention to timing and technique to ensure the best possible results. Here’s a quick recap of the key points covered in this guide:
- Timing is crucial: Harvesting microgreens at the right stage—usually at the cotyledon stage—ensures that you get the best flavor, texture, and nutritional value from your greens.
- Key indicators: Pay attention to the height, color, and growth time of your microgreens. Factors like light and temperature also play a role in determining when to harvest.
- Proper harvesting technique: Use sharp scissors or a knife to cut the microgreens just above the soil line. The “snip and lift” technique helps keep your greens clean and free from soil contamination.
- Post-harvest care: Store microgreens properly to retain freshness and nutrition. Clean them gently and avoid common storage mistakes such as excess moisture or exposure to light.
Take Action:
Now that you know how and when to harvest your microgreens, why not give it a try? Whether you’re growing for personal use or to sell at the market, these tips will help you maximize your yield and enjoy the freshest, tastiest microgreens possible. Share your experiences, and let us know which varieties you love growing the most!

