Growing microgreens is a rewarding and fulfilling activity that can bring fresh flavors and nutrients right to your kitchen. These tiny greens are packed with vitamins and minerals, making them a fantastic addition to salads, sandwiches, and smoothies. In this guide, you will learn effective techniques on how to grow microgreens successfully, ensuring you get the best results.
Understanding How To Grow Microgreens
Microgreens are young seedlings of edible vegetables and herbs. They are typically harvested just a few weeks after germination. Some popular varieties include:
- Basil
- Radish
- Sunflower
- Cilantro
- Peas
These tiny plants have intense flavors and are easy to grow, making them perfect for any home gardener.
Selecting the Right Seeds
To start your microgreens journey, you first need to choose the right seeds. Opt for non-GMO and organic seeds to ensure you are growing healthy greens. Some excellent starter options are:
- Mustard greens
- Beet greens
- Chives
- Broccoli
Always read the seed packet for specific growing instructions, as different microgreens may have unique requirements.
Gathering Your Supplies
For successful microgreen growth, you’ll need a few essential supplies:
- Containers: Shallow trays or seedling flats work well. Make sure they have drainage holes.
- Growing medium: You can use potting soil, coconut coir, or hemp mats. Choose one that retains moisture but allows for good drainage.
- Water: A spray bottle can help you moisten the soil without overwatering.
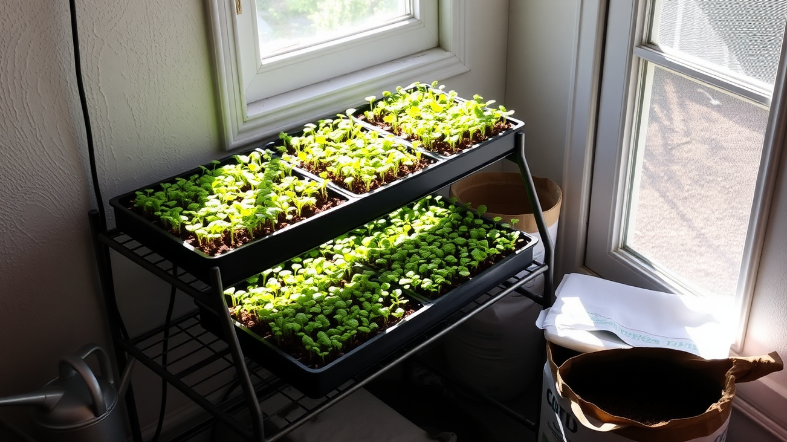
- Light source: Natural sunlight is best; however, you can use grow lights if needed.
Once you have these supplies, you’ll be ready to start the growing process!
Planting Microgreens
Follow these steps to plant your microgreens:
- Fill your container: Add your chosen growing medium to the container, filling it about one inch deep.
- Moisten the soil: Use your spray bottle to gently water the soil until it is evenly moist but not soggy.
- Sow the seeds: Scatter the seeds evenly across the surface. You can space them closely since they will be harvested young.
- Press down gently: Lightly press the seeds into the soil to ensure good contact.
- Cover if needed: Some seeds benefit from light coverage; check your seed packet for guidance.
Caring for Your Microgreens
Microgreens need care as they grow. Here are some essential tips:
- Watering: Keep the soil consistently moist. Use a spray bottle to avoid flooding them.
- Light: Ensure your microgreens get 12-16 hours of light daily. Adjust your light source as they grow.
- Temperature: Microgreens thrive in temperatures between 65°F and 75°F (18°C to 24°C).
Harvesting Your Microgreens
Microgreens are generally ready for harvest in 7-21 days, depending on the variety. Here’s how to harvest them:
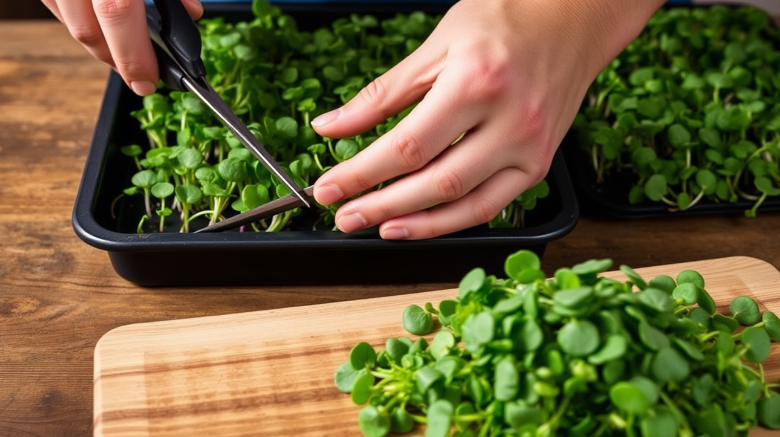
- When they reach about 2-3 inches tall, use scissors to snip just above the soil line.
- Wash the greens gently under cold water to remove any soil particles.
- Store them in a paper towel-lined container in the fridge for freshness.
Growing microgreens at home is not only easy but also a fun way to enjoy fresh greens all year round. With the right seeds, supplies, and care, you can create a lush microgreen garden in your own kitchen. Enjoy the process and the delicious bounty that your efforts will yield!
The Nutritional Benefits of Microgreens

When looking for ways to boost your diet, microgreens are a fantastic option. These tiny plants are packed with nutrients and can add vibrant flavors to your meals. Wondering what makes microgreens so special? Let’s dive into their impressive nutritional benefits.
Rich in Vitamins
One of the standout features of microgreens is their significant vitamin content. Many microgreens can contain higher levels of vitamins than their mature counterparts. For example:
- Vitamin C: Microgreens like radish and broccoli provide a powerful dose of this antioxidant, helping boost your immune system.
- Vitamin K: Found abundantly in pea shoots, vitamin K is essential for bone health and proper blood clotting.
- Vitamin E: Sunflower microgreens are great sources of vitamin E, which supports skin health and protects against oxidative stress.
Packed with Minerals
Not only do microgreens come loaded with vitamins, but they also offer an impressive array of minerals. These tiny greens can be a great addition to ensure you’re getting enough essential minerals in your diet:
- Iron: Many types of microgreens, such as amaranth, are rich in iron, which is crucial for red blood cell production.
- Calcium: Some varieties like kale microgreens can help increase your calcium intake, vital for maintaining healthy bones and teeth.
- Magnesium: Microgreens like basil are excellent sources of magnesium, which plays a role in over 300 enzymatic reactions in the body.
High in Antioxidants
Antioxidants are essential for combating free radicals in the body, which can lead to chronic diseases. Microgreens deliver a significant amount of antioxidants. Some common varieties like beet and cabbage microgreens have high levels of polyphenols, which are known for their health benefits. Including these in your meals daily can help protect your body from oxidative damage.
Boosting Gut Health
Microgreens also contribute to gut health due to their fiber content. While they are small, they still provide a decent amount of dietary fiber, which is crucial for digestion. Eating fibers can improve bowel regularity and nourish the good bacteria in your gut. While they add flavor and texture to meals, their fiber properties can also enhance overall health.
Low in Calories
If you’re watching your caloric intake, microgreens are an excellent choice. They are extremely low in calories while still providing a host of nutrients. You can add a handful of microgreens to sandwiches, salads, and smoothies without worrying about overloading on calories. This makes them a guilt-free way to enhance the nutritional value of your meals.
Versatile Culinary Uses
Another advantage of microgreens is their versatility in the kitchen. You can easily incorporate them into various dishes:
- Salads: Add a fresh, crunchy touch with microgreens like arugula or mustard greens.
- Smoothies: Blend a handful of microgreens into your morning smoothie for an added nutrient boost.
- Sandwiches and wraps: Substitute regular leafy greens with microgreens for a flavorful twist on your favorite sandwiches.
Easy to Grow at Home
Not only are microgreens nutritious, but they’re also simple to grow, making them accessible for anyone. You can start growing them easily on a windowsill, requiring minimal space. With just a few supplies, including seeds, soil, and water, you can enjoy fresh microgreens right from your kitchen.
Adding microgreens to your diet isn’t just a trend; it’s a smart way to elevate your health. Their robust nutrient profile supports everything from skin health to digestion, making them valuable for any meal. Start with a few varieties and experiment with creative recipes to fully appreciate the diverse flavors and benefits these tiny greens offer. Happy gardening and eating!

Choosing the Right Containers for Microgreen Cultivation
When you embark on your journey to grow microgreens, one of the most crucial decisions you’ll make is choosing the right containers for cultivation. The container you select can significantly impact your growing experience and the health of your microgreens. Let’s explore some key factors to consider in your decision-making process.
Material Matters
Different materials offer various benefits when it comes to growing microgreens. Here are some common options:
- Plastic Trays: Lightweight and affordable, plastic trays are popular among beginners. They often come with drainage holes and are easy to stack, saving space.
- Biodegradable Containers: Made from materials like coconut coir or peat, these eco-friendly options break down over time. They’re great if you value sustainability.
- Glass Containers: While more elegant, glass containers can be heavy and require careful handling. If aesthetics appeal to you, this could be a stylish choice.
- Metal Trays: Durable and long-lasting, metal trays retain heat well, but they can be more expensive than plastic options.
Size and Depth
The size and depth of the container affect root growth and moisture retention. When choosing the right container, consider:
- Depth: A depth of about 2-3 inches is ideal for most microgreens. This allows enough space for roots to develop without overcrowding.
- Size: Larger containers can house more plants and facilitate better growth, but they require more space. Assess your growing area before deciding.
Drainage and Aeration
Proper drainage is essential for healthy microgreens. Standing water can lead to mold and root rot, harming your plants. Look for containers that have:
- Drainage Holes: Ensure your containers have small holes at the bottom to allow excess water to escape.
- Breathability: Consider perforated trays or containers designed for aeration. These encourage healthy root growth while preventing waterlogging.
Ease of Use
Your convenience during the growing process is key to success. Choose containers that are easy to manage, especially if you’re new to growing microgreens. Here are some aspects to think about:
- Weight: Lightweight materials are easier to move, especially when transferring or checking on growing greens.
- Cleaning: Look for containers that are easy to clean. This helps prevent pests and disease from contaminating your next crop.
Cost-Effectiveness
While investing in quality containers is important, budget considerations are also vital. Prices for microgreen containers can vary significantly. Here are some ways to save without compromising quality:
- Reuse and Repurpose: Many household items, such as yogurt cups or takeout containers, work well for growing microgreens if they have drainage holes.
- Buy in Bulk: If you plan to grow microgreens regularly, consider purchasing bulk containers to save money in the long run.
Customization and Visibility
If you enjoy experimenting, consider personalizing your containers. This can include labeling each one with the type of microgreen it holds for easy identification. Additionally, choosing transparent containers allows you to monitor root growth and moisture levels without disturbing the plants.
Temperature and Light Factors
Different materials respond uniquely to temperature changes. Some materials retain heat better, which can influence how quickly your seeds germinate. Ensure your containers are placed in a spot with adequate light, as most microgreens thrive in bright, indirect light.
Selecting the right container for growing microgreens involves understanding your specific needs and preferences. Whether you prioritize sustainability, convenience, or aesthetics, there’s a container that fits. By carefully considering material, size, drainage, and cost, you set yourself up for a successful microgreen-growing experience. Happy planting!
Common Mistakes to Avoid When Growing Microgreens

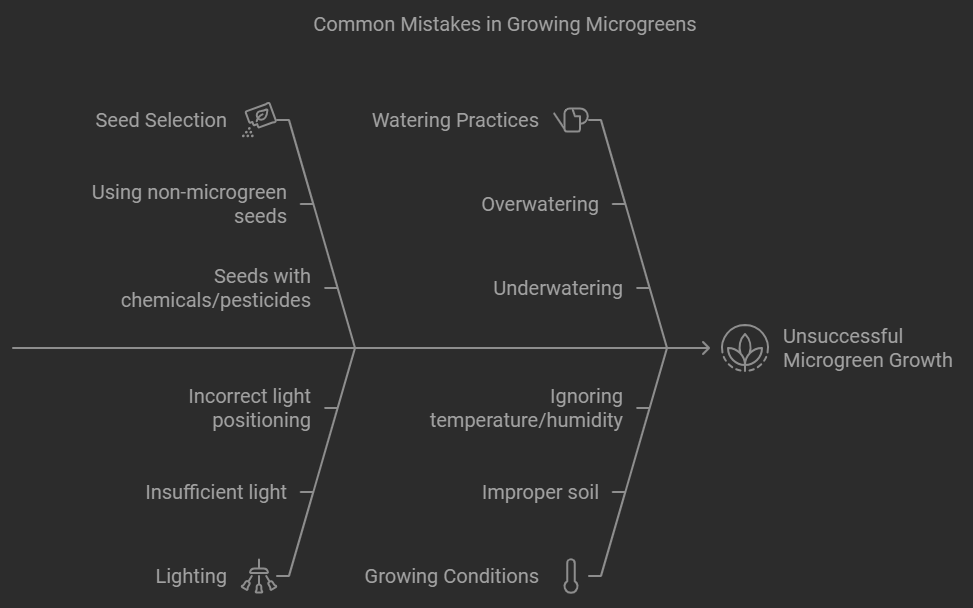
Growing microgreens can be an incredibly rewarding hobby, providing you with fresh, nutritious greens right in your home. However, many beginners make common mistakes that can hamper their success. By being aware of these pitfalls, you can ensure your microgreen growth is both fruitful and enjoyable. Here are some essential mistakes to avoid when you’re on your microgreens growing journey.
1. Not Choosing the Right Seeds
The foundation of successful microgreen cultivation starts with quality seeds. Not all seeds are suitable for microgreens. It’s crucial to select seeds specifically labeled for microgreens. Popular options include:
- Basil
- Radish
- Sunflower
- Pea shoots
- Broccoli
Always check that your seeds are free from chemicals, pesticides, and irradiation. This ensures that your microgreens are not only healthy but safe to eat.
2. Inadequate Lighting
Light plays a vital role in growing microgreens. Failing to provide adequate light can lead to leggy, weak plants that lack flavor. Here’s what you should consider:
- Use grow lights if you don’t have access to natural sunlight, especially during darker months.
- Position light sources about 2-4 inches above your microgreens for optimal growth.
- Provide 12-16 hours of light each day.
3. Incorrect Watering Practices
Watering your microgreens may seem straightforward, but it’s easy to overdo it or underdo it. Both can lead to unhealthy greens. Aim to:
- Water gently using a spray bottle to avoid displacing seeds.
- Check the soil moisture level by touch; it should be damp but not soggy.
- Avoid letting your greens dry out completely.
4. Using Improper Soil or Growing Medium
The medium you use for growing microgreens is crucial. Many beginners use regular garden soil, which is not ideal. Instead, consider:
- Choosing a seed-starting mix that drains well.
- Using coconut coir, which holds moisture without becoming waterlogged.
- Avoiding solutions that contain fertilizer, as microgreens need minimal nutrients initially.
5. Overcrowding Seeds
While it may be tempting to plant a lot of seeds in one tray, overcrowding can lead to poor air circulation and unhealthy plants. Keep these points in mind:
- Follow the recommended seed density for each type of microgreen you are planting.
- Leave space between seeds to encourage better growth and airflow.
- Thin out crowded seedlings if necessary, giving stronger plants room to thrive.
6. Ignoring Temperature and Humidity Levels
Microgreens thrive best in a controlled environment. Ignoring these factors can lead to poor germination or unhealthy plants. To create the perfect conditions:
- Maintain temperatures between 65°F to 75°F.
- Keep humidity levels moderate to promote good germination.
- Cover your seeds with a humidity dome until they sprout, then remove it to allow airflow.
7. Neglecting to Harvest on Time
Harvesting your microgreens at the right time is essential. Waiting too long can lead to bitter flavors or reduced nutrients. Remember these tips:
- Harvest when the first true leaves appear, typically between 7-21 days, depending on the type.
- Use clean scissors to cut just above the soil line.
- Enjoy your microgreens fresh for the best flavors and nutrients!
By steering clear of these common mistakes, you set yourself up for a successful microgreens growing experience. Remember, every grower’s environment and methods may differ, so don’t be afraid to experiment and find what works best for you. With patience and attention to detail, your efforts will soon reward you with a delightful bounty of vibrant microgreens to enjoy.
Top Microgreen Varieties for Beginners
If you’re just starting your journey into growing microgreens, you may be wondering which varieties are the easiest and most rewarding to cultivate. Microgreens are vibrant, young plants that pack a punch in both flavor and nutrition. Not only are they simple to grow, but they can also enhance your dishes. Here are some top microgreen varieties that beginners can easily grow at home.
Radish Microgreens
Radish microgreens are among the quickest to grow, often ready in just 7-10 days. They have a spicy flavor that can add zest to salads and sandwiches. Radish seeds are inexpensive and widely available, making this a fantastic choice for newcomers. To grow them, simply sprinkle the seeds densely over a tray filled with potting soil and cover them lightly with a thin layer of soil. Keep them moist and in a well-lit area.
Basil Microgreens
Basil microgreens are aromatic and flavorful, perfect for enhancing dishes like pasta and pizzas. They typically take about 10-14 days to sprout. You can grow them using soil or hydroponically. For the best flavor, ensure they receive plenty of light and warmth. It’s best to snip them just above the soil to encourage bushier growth.
Pea Shoots
Pea shoots are another beginner-friendly option. Known for their sweet taste and crunchy texture, they are great for salads, stir-fries, or as a fresh garnish. They generally grow within 14-21 days. To plant, soak the seeds overnight before sowing them in rich, moist soil. They love bright light, but direct sunlight can be too harsh, so find a spot with indirect light.
Sunflower Microgreens
Sunflower microgreens are not only good for your health but also visually appealing with their bright green leaves. They have a nutty taste and are wonderful in salads or as a standalone snack. These typically take about 7-10 days to grow. Just soak the seeds for a few hours before spreading them on moist soil and covering them with a thin layer of soil to encourage the seeds to germinate.
Broccoli Microgreens
Broccoli microgreens are nutritional powerhouses; they contain high levels of vitamins and antioxidants. They take around 7-14 days to mature and can be added to sandwiches, smoothies, and salads. Start them in a shallow tray with a good-quality potting mix. Water them gently to keep the soil moist, but be cautious not to overwater.
Mustard Microgreens
Mustard microgreens bring a bold flavor to the table. They typically grow in about 7-10 days and have a peppery taste much like arugula. They’re perfect for salads or as seasonings in various dishes. To grow, sprinkle the seeds generously on moist soil and use a humidity dome or cover with plastic wrap until they germinate.
Tips for Growing Microgreens

When growing microgreens, here are some essential tips that can make a difference:
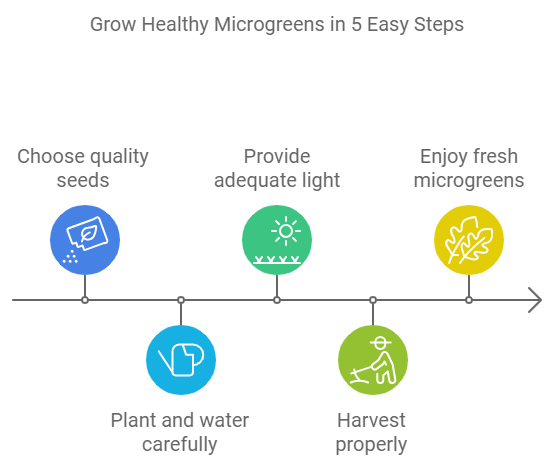
- Use quality seeds: Start with organic seeds to ensure that your microgreens are healthy and free from pesticides.
- Water carefully: Overwatering can lead to mold or root rot, so water your microgreens gently.
- Provide adequate light: Microgreens need about 12-16 hours of light per day. If natural light is scarce, consider using a grow light.
- Harvest properly: Use sharp scissors to snip microgreens just above the soil level, and always harvest when they are young for the best flavor.
Growing microgreens can be a fun and rewarding hobby, especially for beginners. With the right varieties and care, you’ll soon be able to enjoy fresh microgreens in your meals. This not only enhances flavor but also boosts nutrition in your diet!
As you cultivate these microgreens, be sure to experiment with flavors and combinations. You may find delightful surprises in your kitchen as you explore the world of microgreens!
Key Takeaway:
1.Growing microgreens at home is an enriching and rewarding experience, one that provides delicious and nutritious additions to your meals. As you embark on your microgreen journey, several key techniques can enhance your growing success. First, it’s essential to understand the nutritional benefits that microgreens offer. These tiny plants are packed with vitamins, minerals, and antioxidants, often containing higher nutrient levels than their mature counterparts. them into your diet can significantly improve your overall health.
2. When it comes to the physical aspect of growing microgreens, choosing the right containers can make all the difference. Opt for shallow trays or containers with good drainage to promote healthy root development. There are numerous options available, such as plastic seedling trays, wooden flats, or even repurposed containers from your kitchen. The key is to ensure that air circulation is optimal and that the containers are clean to prevent disease.
3. However, even seasoned gardeners can make mistakes. Common pitfalls include overwatering, planting seeds too densely, or neglecting to provide adequate light. Monitoring the moisture level and ensuring the soil is very lightly moist—not soggy—is crucial. Also, remember that less can be more when it comes to seed density; giving each seed ample space will improve your yields.
4. For beginners, choosing the right varieties can also make your growing experience smoother. Some beginner-friendly microgreens include broccoli, radish, and mustard greens. These varieties germinate quickly, are relatively easy to care for, and offer robust flavors that can elevate your dishes.
5. Growing microgreens at home brings a wealth of benefits, from their high nutritional value to the joy of nurturing plants. By employing effective techniques and avoiding common mistakes, you can enjoy a thriving microgreens garden. Don’t hesitate to experiment with different varieties and containers to discover what works best for you. Happy growing!
Conclusion
Growing microgreens at home is not just a delightful hobby but also a rewarding venture that can elevate your culinary experience and boost your health. By implementing effective techniques, such as using optimal lighting, maintaining the right moisture levels, and ensuring proper air circulation, you’ll be well on your way to a thriving microgreen garden. These tiny plants pack a powerful punch nutritionally, offering a wealth of vitamins, minerals, and antioxidants that can benefit your overall well-being.
Choosing the right containers is crucial for successful cultivation. Whether you opt for seed trays, recycled containers, or biodegradable pots, ensure they have good drainage to prevent waterlogging. By avoiding common mistakes like overwatering or neglecting to provide enough light, you can create an ideal environment for your microgreens to flourish.
For beginners, starting with easy-to-grow varieties such as radish, sunflower, or pea shoots can build confidence and provide quick results. As your skills grow, you can experiment with more diverse flavors and textures that will enrich your dishes.
Embracing the art of growing microgreens opens doors to nutritious meals and a deeper connection with your food. It offers an opportunity to engage your senses while transforming your living space into a mini-garden. So gather your supplies, make a plan, and enjoy the journey of cultivating these vibrant greens right in your own home. Your body—and taste buds—will thank you for it!

